Book Review: Veganish

This is a first. Today I bring to you a book review!

veganish

Upon receiving my copy of Veganish – the omnivore’s guide to plant-based cooking I wasn’t exactly sure what to expect. I had read a description of the book and it sounded to me like a vegan cookbook. I went straight to the recipes in this book, glancing over the titles of them and they all sounded vegan to me. But when I read a bit further, I noticed each recipe included “omnivorous variations”. I guess that’s where the title “vegan-ish” comes in… This was kind of confusing to me and definitely made me have mixed feelings about the book.

I don’t really know what the author was aiming for in creating a book like this. I do understand that sometimes vegan dishes don’t always appeal to omnivores, or sometimes omnivores wouldn’t look twice at a plant based cook book – but on the other hand is giving an omnivore options with a vegan dish to make it not vegan anymore really going to help them transition to a more plant based diet? Wouldn’t the omnivore already know how to throw some chicken or butter into their dish if they felt like it?

I feel it may be hard to read a book like this and actually be persuaded to include more exclusively vegan dishes in their diet, especially when the author goes into detail about being vegetarian, and then vegan for a lot of years but then going back the other way, becoming a (as she calls it) reluctant omnivore. People do not usually welcome an adjustment like changing their diet very easily, so seeing options to add animal products into some amazing vegan dishes may be too familiar and comfortable to someone who has trouble with change.

On the other hand, this book could possibly help people discover the ingredient swaps and options for enjoying vegan food. It might be able to help those slowly transitioning to a plant based diet, for those that are actually committed to becoming plant based. And I do know that slowly changing your habits is important – I certainly didn’t become vegan overnight. Also, I realize there are families with various dietary preferences, where certain family members refuse to change and they all need to get along at meal time, so it could be a good resource for these people. After being vegan for over 3 years now, it’s been great seeing those close to me learning more about using plant based ingredients and being interested in incorporating them in their own lives!

So anyways, now I’d like to discuss my experience cooking from this book.

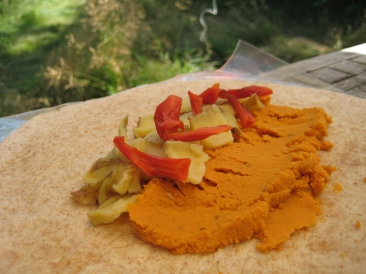
There are so many tasty-sounding recipes in the book, but the one that stood out to me first was the Thai green curry vegetable stew. I’ve always loved the green Thai curry you find at Thai restaurants and have never seemed to be able to recreate my own. This recipe was exactly what I have been looking for; it was amazingly flavorful and easy. I opted for the tofu variation of this recipe by pan frying chunks of tofu with some coconut oil, salt and pepper and adding it in. For the veggie mix I used red bell pepper, mushroom, celery and carrot. I couldn’t get fresh basil so I added a couple teaspoons dried. This recipe will become a regular in my home! I’ve made it twice in two weeks.

THAI GREEN CURRY VEGETABLE STEW

Yields about 4 servings
Delicious and easy, this is great over Coconut Jasmine Rice (Grains).
Choose a quality curry paste with all-natural ingredients (see About Quality Ingredients).

Combine in a medium soup pot:

  • 1 Tbsp coconut oil
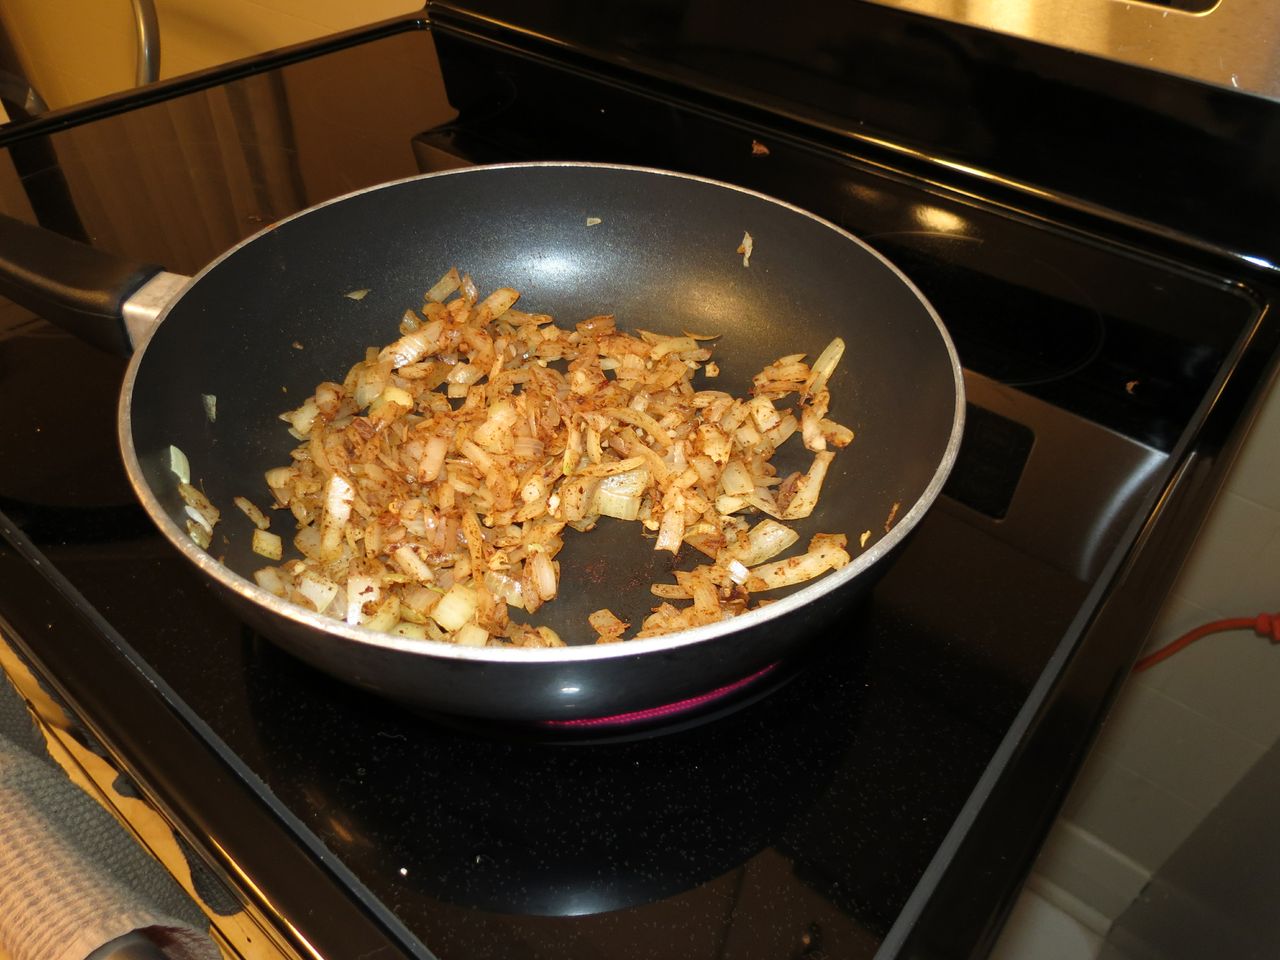
  • 1 yellow or white onion, diced
  • 1 tsp salt
    Cook over medium heat for about 8–10 minutes, until onion is translucent.

Add:

  • 1 Tbsp grated fresh ginger
  • 2 cloves garlic, minced
  • 1–3 Tbsp prepared Thai green curry paste
  • ¼ cup mirin, white wine, stock, or water
    Cook for 3 minutes more, stirring to lift pieces off the bottom of pan.

Add:

  • 4 cups assorted vegetables, such as zucchini, broccoli, bell peppers, mushrooms, and snow peas
  • 1 can full-fat coconut milk
    Simmer until vegetables are cooked.

Add:

  • ¼ cup whole Thai basil leaves
  • juice of 1 lime
  • 1–2 tsp Sucanat or coconut sugar, to taste

Adjust salt, sweetener, and lime to taste. Serve over rice.

Variation

  • To add [extra] protein to this dish, add tofu (fresh or fried separately in coconut oil) with the seasoned coconut milk. Simmer until almost fully cooked before adding vegetables so as not to overcook them.
  • I sometimes blanch and shock (see Essential Techniques) the  vegetables separately and add them at the end to keep them perfectly cooked.

thai green curry simmering in a pot

cooked thai green curry plated with white rice

If this book is what you’ve been looking for, here is some further information.

Buy Links

About the Author:

Mielle Chenier-Cowan Rose has been a vegan chef and advocate for natural living for over 15 years. She studied healing foods and culinary nutrition at Bauman College and has worked with some of the most prominent vegetarian restaurants in the San Francisco Bay Area, including the raw food restaurant phenomenon Café Gratitude. Readers of her culinary writing can almost taste the uncommon reverence she has for her ingredients, for cooking, and for every being on the planet. She lives in Nevada City, CA.
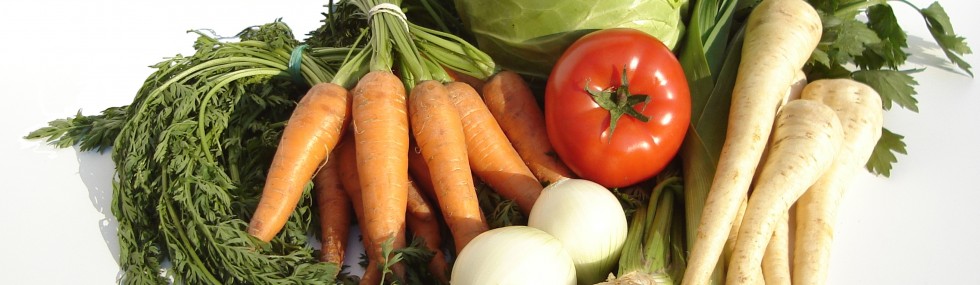
 

Cheesy Fiesta Spaghetti Squash

This summer has been another very busy one! Our garden is getting huge again and it’s starting to produce yummy things. I haven’t blogged in a while, but I got pretty excited by my creation using our first spaghetti squash of the year, so I’m here to share!

It all started with the spaghetti squash and knowing I had some cheesy sauce frozen. I also had garden tomatoes and green onion. Here is the sauce I had stockpiled because it’s awesome, and freezes well. Try this one on nachos guys, om nom nom!!

Cheesy Fiesta Spaghetti Squash

Serves two hungry people, with leftovers

* these measurements are an approximate guideline – I did not measure, it was just thrown together.

  • 1 large spaghetti squash
  • ~2 cups vegan cheese sauce divided among the two squash halves (the amount you use is up to you!) This sauce has a nacho-y edge so it goes really well with this recipe; however – feel free to sub in any vegan cheese sauce you like. You can also thin this sauce with water while making it, if it seems too thick.
  • 1, 15 oz. can black beans
  • frozen or fresh corn, around 1/2 cup or so
  • chopped green onion, about 4 large stalks
  • 2 tomatoes, diced
  • salt & pepper
  • drizzle of olive oil

Preheat the oven to 375°F.

SLOWLY AND CAREFULLY cut the squash in half lengthwise with a sharp knife.

Scoop out and discard the seeds.

Place squash halves cut side up on a heavy-bottomed roasting pan. Brush with olive oil if you’d like.

Roast the squash for around 30 minutes, then remove from the oven. You’re going to fill the squash up with yummy ingredients and then cook it the rest of the way.

Fill the hollowed out center of the squash halves with divided amounts of black beans, corn and green onion.

spaghetti sqash filled with black beans and corn

Next, top with generous amounts of sauce, tomato, and more green onion. Sprinkle with some salt and pepper, and drizzle a little bit of olive oil on top.

spaghetti sqash filled with sauce and tomato

Return the squash to the oven and continue to cook until a fork punctures the flesh of the squash easily, and you can scrape the flesh with a fork and see stringy “noodles”. This should take approximately 20 – 30 minutes.

cooked cheesy fiesta spaghetti squash

Remove squash from the oven and allow it to cool a bit so you can handle it. Scrape the flesh and contents from the squash, using a fork, into stringy noodles into a serving bowl and dig in!

Growing Your Own Produce – Square Foot Gardening

Anybody else reading this blog live in Canada? Are you reading this during Winter 2013-14? Then enough said. I’m sure you’re going as crazy as I am. This winter has been the absolute worst. Non stop freezing temperatures. More snow than we know what to do with. Give us a break and bring an early Spring, mmmkay Mother Nature!?

In order to mentally escape from this winter’s reign of terror, I’ve been thinking a lot lately about gardening. Last summer was the first opportunity I had to finally start a garden of my very own. We finally had a house and a yard of our own, and I wasn’t about to wait another year (after MANY years of apartment living) to get going, even though we had been in the house under 6 months and were mid-bathroom renovation. So my husband and I researched, planned and executed our garden. We were so happy with the result, I wanted to share the experience with you all! I hope it inspires you to grow something, no matter if it’s on a large or small scale.

We started our gardening research with a book called All New Square Foot Gardening, by Mel Bartholomew. If you are considering growing anything, whether you have a tiny amount of space, or have a huge yard, get your hands on this book! I think it is the best resource you can use. If you follow the method in this book, I can pretty much guarantee you will actually enjoy gardening. All it really takes is a proper set up, and most of the rest of the time is spent enjoying it. It is not only efficient, but you do not have to worry about learning how to improve whatever existing soil you might have. You don’t need to own a bunch of gardening equipment (who wants to go out and buy a rototiller!?), fertilize, spend hours bent over weeding, and you can scatter your garden around as you wish instead of having one big boring row garden at the back of your yard!

So once we decided we were going to create a square foot garden, we needed to plan how much we wanted to grow and where we could grow it in our yard. After some Google searches on garden planning tools, I came across an online garden planner software. The one I used is GrowVeg.com (I have no affiliation to this company – I am sure there are other planners out there, this is just the one I use). Although a tool like this is not necessary, I found it to be really helpful, especially as a gardening newbie! We decided that we would need a total of five boxes of varying sizes. Two of them would have trellis for anything we needed to grow vertically.

We also decided to grow a big variety and to start everything from seed ourselves. I realize this may have been quite ambitious for our first time at all of this, which the book even warns against – and it might be for some, but my husband and I are the “go big or go home” type people. We wanted to just go for it. After all, we had been waiting for this opportunity for many years. If you are overwhelmed by going big or a lot of work the first time, then start small. You can always build up your garden and your knowledge over time. Do what works for you!

tomato, leek and onion seedlings

Tomatoes, Leeks and Onions

Once deciding on what we wanted to grow with the help of our garden planner, next we searched for a source for seeds. We found a local heirloom seed company offering organic, untreated, non-GMO , open pollinated seed. Wonderful! And since we used the GrowVeg garden planner, we began receiving emails to let us know what seeds to start indoors, and when! How awesome is that? It definitely made our ambitious plans go smoothly. We made a set up in our basement with fluorescent lights, small heater, fan and a table and got our seeds going in the necessary phases. Everything we started from seed worked! It was a great feeling of success.

plants started from seed in the basement

The most important component of getting our garden going properly with the square foot gardening method was the soil blend made of 3 components, called “Mel’s Mix” by the square foot gardening book. If you don’t do this right, you are not as likely to get the kind of success you should with square foot gardening. So we sourced our soil ingredients from a garden center and a local company providing high quality compost, and figured out the quantities needed in preparation for building and planting the garden. Those little plants growing in our basement soon needed a home! Next came gathering the building materials (the square foot gardening book has lots of information on construction). We chose untreated cedar so the boxes will be around for years to come. Cedar also smells amazing… We built the boxes according to the plans we made, put the weed cloth on the bottoms with a staple gun, and moved them around the yard into position.

components of soil mix for square foot garden

building garden boxes for square foot garden

arranging square foot garden boxes

Once the boxes were ready, we blended our soil mixture on a large tarp so we could get ready to fill our garden boxes. After double checking everything was exactly where we wanted it, we filled the boxes. What a feeling of accomplishment! The hardest part was over.

blending mel's mix soil mixture on a tarp

square foot gardening boxes filled with soil

Before planting, the last step was creating “the grid”. Also very important to square foot gardening. You need to see where each square foot is in your boxes. It made planting seeds and transplanting with the proper spacing a breeze (and can I even say…fun?). We used sturdy, small strips of wood to create our grids for the boxes.

square foot gardening grid with holes poked in the soil to show plant spacing

a table of transplants ready to go in the garden boxes

Now our plants could settle in their homes. And boy, did they grow.

planted square foot garden with trellis

We put up trellis to support any crops that can grow vertically. We also enclosed each box with chicken wire to keep the rabbits out.

Finished square foot garden yard with mulch between garden boxes

Finishing touches were added to our yard. It really brought the whole thing together.

The plants were happy in their little garden boxes…

6 by 3 square foot garden box with chamomile, green onion, onion, oregano, broccoli, cabbage, corn

From top: chamomile, green onion, onion, oregano, broccoli, basil, cabbage, corn.

8 by 2 square foot garden box with trellis and tomato, pepper, cucumber, tomato, parsley, peas, calendula, tomato, basil, cucumber, bush wax beans, more tomato and cucumber, zucchinis

From top: tomato, pepper, cucumber, tomato, parsley, peas, calendula, tomato, basil, cucumber, bush wax beans, more tomato and cucumber, zucchinis.

2 by 3 Square foot garden box with Kale, lettuce, spinach, beets

Kale, lettuce, spinach, beets.

Square foot gardening in pots. Dill, pepper, calendula, pumpkin, chives.

Square foot gardening in pots. Dill, pepper, calendula, pumpkin, chives. The pepper loved growing in a pot, while the pumpkin wasn’t happy and died.

Square foot gardening with root crops such as carrots, parsnips and leeks required a deeper box to grow

The root crops such as carrots, parsnips and leeks required a deeper box to grow.

pumpkin and squash in a square foot garden

Pumpkin and spaghetti squash. These required 2×2 squares for each.

growing square foot garden

Beginning of July

square foot garden growth, end of July

End of July. What a difference 1 month makes!

Mid-to-later August growth.

Mid-to-later August.

square foot garden growing pumpkin and squash vertically

Ever see pumpkin and squash grow vertically? I was pretty proud of these beasts.

Here are some shots of goodies we had throughout the summer…

white blooms on apple tree

Did I mention our house has apple trees!? How perfect for us. These were the blooms we saw while we first planted our garden back in May.

gala apples

Gala apples. The other tree is Golden Delicious!

pea pods

Pea pods starting to grow

having coffee and harvesting herbal flowers in a square foot garden

One of my favorite things was coming out to the garden in the morning with my coffee and caring for the garden, harvesting, etc. A great way to start the day.

Harvest of lettuce, spinach, beet greens, chamomile and calendula.

Harvest of lettuce, spinach, beet greens, chamomile and calendula.

ripe raspberry on a rasperry bush

Our home also came with raspberry bushes!

small corn cobs

The corn cobs didn’t grow very big. I’m not sure if they were worth the space. However, non-GMO corn is difficult to find, so growing my own might be the best option.

harvested yellow wax beans

Yellow wax beans. Our one square foot of beans produced a lot and I will grow an additional square next time.

20130728_110721

large pumpkin (34 pounds) grown in square foot garden

We got one GIANT (34 pound!) pumpkin from our plant. Next time I plan on growing small sugar pumpkins, but how impressive is this!?

broccoli head

We grew several broccoli, cauliflower, and brussel sprout plants. The plants got enormous and we only had one plant produce a head. Sad face. Next time I won’t grow these. They would probably be better off grown in the front yard; not crammed into one square foot of the garden where they shade out other plants.

harvested heirloom zucchini

I loved the look of these zucchinis. Heirloom vegetables are the best! We got tons of them from our two giant plants.

spaghetti squash

We got about 5 spaghetti squash from one plant and they were amazing.

dinosaur kale

We had a ton of dinosaur kale.

table full of ripe tomatoes

The tomatoes were destined for salsa and sauces.

A tiny carrot with small sweet peppers in the background.

A tiny carrot with small sweet peppers in the background.

Harvest of cucumbers, tomatoes, beans, apples, onions, beets, and squash.

Harvest of cucumbers, tomatoes, beans, apples, onions, beets, and squash.

Pumpkin, carrots, peppers, beans, herbs, leeks, squash, parsnips.

Last harvest of the season as the frost was on its way. Pumpkin, carrots, peppers, beans, herbs, leeks, squash, parsnips.

Are you going to try a square foot garden this summer?

Smoky Cashew Cheese Stuffed Mushrooms

Eeep! I haven’t been making posts lately. I think I can blame it on buying our first house about a year ago; it made for a busy summer including our first garden (and I hope to do a gardening post later to share my experience). I created something today that’s pretty delicious, and since I’m kinda proud of my creation, I decided I’d better get posting this in a timely fashion.

Oh, by the way, you can now Follow my blog with Bloglovin

I’m sure many of you have gatherings coming up with friends and family. Maybe you’re hosting or bringing something to a gathering. I think these would be a crowd pleaser, unless you are trying to feed these to a mushroom-hater. I used to be one of these mushroom haters but now I stuff my face with them! I guess my taste buds grew up.

Instead of the traditional processed cream cheese as the base, I used a home made cashew cheese. This cashew cheese is super easy; it’s just a matter of trying to remember to soak the cashews and then popping everything into a food processor or high speed blender. It’s worth the small amount of effort required to whip up a batch.

I wasn’t precise when making this recipe so my measurements could be off a bit. I think it should be quite forgiving though as long as you have the cashew cheese right. Please do let me know if you try my recipe out!

Smoky Cashew Cheese Stuffed Mushrooms

Makes 12 mushrooms

  • 12 whole fresh mushrooms
  • 1 Tbsp. olive oil or cooking oil of choice
  • 1 Tbsp. fresh garlic, minced
  • ~8 oz. cashew cheese, probably around 1 cup (picture a regular tub of cream cheese from the store and filling it with cashew cheese) – recipe here 

    I didn’t blend my cashew cheese until ultra creamy, it still had a slight chunky texture.You can use any extra cashew cheese to dip crackers or veggies

  • 1/8 tsp. ground black pepper
  • ~1/8 tsp. ground cayenne pepper
  • liquid smoke, to taste (should be around the bbq sauces in the grocery store)
    This gives a bacon-y flavor.
  • Tamari, to taste
stuffing for vegan stuffed mushrooms

Don’t judge my 50’s kitchen.

Preheat the oven to 350˚F. Spray a baking sheet with cooking spray of choice (I use a sprayer similar to this one and fill it with olive oil).

Clean the mushrooms with a damp paper towel. Carefully break off the stems and chop them extremely fine, discarding the tough ends.

Heat the oil in a large skillet over medium heat. Add the garlic and mushroom stems and sauté until soft and caramelized, about 2 minutes.

Add to a bowl with the cashew cheese, and add pepper, cayenne pepper, and about 4 drops of liquid smoke, and the same number of drops of Tamari soy sauce; and stir until blended.

Fill each mushroom cap with a generous amount of stuffing. Arrange the mushroom caps on the prepared cookie sheet and bake for 20 minutes.

cashew cheese vegan stuffed mushrooms

Enjoy!

baked cashew cheese vegan stuffed mushrooms

I hope everyone has a wonderful holiday season. Merry Christmas!

Delicious Vegan Wrap (or Sandwich) Filling – Starring Chickpeas

If you are someone who likes something portable to eat but you don’t want to buy processed garbage, then try this out. I think this recipe is pretty quick and easy to make, (AND DELICIOUS!) and the great thing about it is you can take it for lunches all week, and there is no heating required. It keeps pretty well in the fridge for about 5 days. Just don’t pre-load the filling into the wraps (if you’re using wraps) until the night before you’re eating it because otherwise it could make for a soggy lunch.

I was inspired by a recipe I found for a vegetarian chickpea sandwich filling on allrecipes.com and tweaked it to make it vegan (and full of good stuff). This recipe can be flexible with the kind of veggies you use. I like to stick with crunchy veggies like fresh cucumber, celery, carrot, and I’ve recently subbed in bell peppers which worked really well too. Use what you have kicking around, add more, whatever you like!

I hope you enjoy as much as I do!

Vegan Chickpea Wrap (or Sandwich) Filling

Makes ~6 large servings – lasts basically all work week for my hubby and me, so you can cut the recipe in half if you don’t need so much.

Ingredients:

  • 2 (19 ounce) cans garbanzo beans, drained and rinsed, then mashed
  • 2 stalks celery, chopped
  • 1 small onion, chopped – green or red onion would probably work well too
  • 2 carrots, chopped finely
  • ¼ cup hemp hearts (optional)
  • ½ cup chopped cucumber
  • 2 tablespoon veganaise (I use Earth Island Grapeseed Veganaise, for those in Canada I buy this at Superstore, natural foods isle where they keep the refrigerated stuff) – if you’re not down with veganise, perhaps mashed avocado would work just as well? It would just turn a bit brown throughout the week.
  • lemon juice of 1 lemon
  • 2 teaspoon dried dill weed
  • Optional: add 2 teaspoons of curry powder (you can do this to change it up if you make the recipe regularly)
  • salt and pepper to taste
  • put in a wrap, with sprouts and/or greens of choice

Directions:

  • Drain and rinse chickpeas (garbanzo beans). Pour chickpeas into a medium size mixing bowl and mash with a fork or potato masher.
Chickpea wrap whole ingredients

The photos show a bit of a backwards order. I got too excited about photographing this which caused me to forget to mash the chickpeas first, separately.

mashing chickpeas

Thankfully I had everything neatly separated for photographing, so I made do and mashed the chickpeas off to the side, then combined everything.

  • Mix in celery, onion, carrots, hemp hearts, cucumber, veganaise (to taste), lemon juice, dill, salt and pepper to taste.

chickpea wrap filling

  • Add filling to a wrap with alfalfa sprouts/greens.
chickpea wrap

Poor photography 😦 I kept forgetting to take a photo of the finished wrap so I had to take this on my phone. Forgive the injustice to this delicious wrap!

Enjoy the fresh flavors!

Easy, Quick, Healthy, and Flavor Packed – Lentil Soup with Wilted Spinach

Reading this recipe really doesn’t do it justice, you’ve got to make this easy soup yourself. I was surprised at how flavorful this turned out – it’s definitely a favorite and I’ve made it several times now. So now I am sharing! I think the key to the flavor here comes from the bay leaf and lemon juice.  Also, I don’t know if you can get much cleaner and healthier than this soup!

I came across this recipe in my cookbook Thrive Foods. (Lots of goodies in that book!)

Lentil Soup with Wilted Spinach

Makes 4 servings – I recommend doubling and freezing if you’re into that.

Ingredients

  • 1 Tbsp coconut oil
  • 2 large garlic cloves, minced
  • 2 cups vegetable broth
  • 1 cup dry lentils, rinsed thoroughly
  • 1 bay leaf
  • 2 Tbsp fresh lemon juice
  • 2 cups packed baby spinach leaves
  • salt and pepper to taste


lentil soup ingredients
Method

In a large soup pot, heat the coconut oil over medium heat. Add the garlic and cook for one minute until garlic is fragrant and begins to turn golden.
Pour in the vegetable broth, and add the lentils and bay leaf. Raise the heat to bring to a boil, then reduce heat to maintain a simmer.

lentil soup broth
Cook, uncovered, for about 30 minutes, until the lentils are just tender, adding more water if necessary to maintain a broth around the lentils.

lentil soup
Stir in the lemon juice and the spinach and cook for 2 minutes longer, or until spinach is bright green and has wilted. Season with salt and pepper to taste and serve warm. (Remove the bay leaf kids, it’s not meant to be eaten.)

adding spinach to lentil soup

wilted spinach in lentil soup

Wilty

The delicious result…

lentil soup

Easy Delicious Green Enchiladas

Well, since I have been so lame at posting anything lately, I wanted to get this goodie up! I was thinking the other day about how good these were and wanted to finally share this post.

I went to a local Mexican restaurant that offered veganized versions of most of their menu (so happy to see a restaurant carrying vegan cheese and cream options to add that extra something to vegan Mexican food). I had their green enchilada and it was so good I knew I’d have to find a recipe to make them at home.

I came across a simple and very tasty recipe for Green Enchiladas on a blog called Vegan Dad. It is thrown together pretty quickly with pre-made ingredients like the salsas, canned chilies, and canned refried beans. If you decided to get all adventurous you could always do these from scratch, but sometimes life is too busy and you need a good ‘n quick meal!

Green Enchiladas

INGREDIENTS
– 1 tbsp oil
– 1 medium sweet onion, diced
– 2 cloves garlic, minced
– 1 tsp chili powder
– 1/2 tsp cumin
– 1/2 tsp cinnamon (don’t skip – it’s SO good)
– 2 cans Old El Paso green chiles, with juices *Note: these are not spicy and they really make the flavor of the dish, be sure to include them!
– 1/2 cup tomato salsa – this is where you can choose your spicy level; choose wisely because the green salsa added at the end tends to be a medium spice.
– 2 cups finely chopped veggie lunch meat (or refried beans, which is what I opted for)
– 1/2 cup shredded vegan cheese (I recommend Daiya Jack Style Wedge) plus more for top, optional
– 10 large tortillas
– 1 1/2 jars green salsa (the amount you use depends on how spicy you want it)

Green Enchiladas
METHOD
Preheat oven to 400 degrees. Grease a 9 x 11 baking dish.

Heat oil in a saucepan over med-hi heat. Saute onion and garlic for 5-7 mins, until translucent. Add chili powder, cumin, and cinnamon and mix well.

onion for Green Enchiladas

Add chiles, salsa, and beans to the pan and bring to bubbling.

filling for Green Enchiladas

Stir in cheese if using, and adjust seasonings to taste. Remove from heat.

filling for Green Enchiladas

filling for Green Enchiladas

Oooh, the creaminess!

Place 1/10th of the filling in a tortilla and roll up. Place in prepared baking dish. Repeat with remaining filling and tortillas. Cover everything with green salsa and as much cheese as you want.

Green Enchiladas ready for the oven

I went the spicy route and slathered these bad boys up with green salsa!

Bake for 20 to 25 mins, or until sauce is bubbling and cheese is melted. Arriba!!

Backpacking Meals, Vegan Style

This post may come at an unseasonable time of year, however after thinking about it – perhaps not! If you’re like me, the miserable cold (in Canada anyway) and lack of decent quantities of sunshine makes me dream of summer and planning summer adventures. Otherwise I’d get pretty depressed.

I spend a lot of my summer planning, preparing for, and going on trips that get me outdoors and away from the city. Camping, hiking/backpacking, and canoeing trips keep me pretty busy during the few summer months we get here. After enough experience from several years of these activities I’ve become more organized. At least I try to be. When it comes to food, I seem to always be more frantic at the last minute trying to pull our meals together. That’s why I hope to do more pre-season preparation while I have the time during the winter months.

So you might be thinking…how the crap do I get meals together many months in advance? The answer is – with my trusty food dehydrator! I love this device and don’t know how I lived without it. This past year I decided instead of trying to find and purchase decent vegan dehydrated/freeze dried meal pouches when I need to pack compact, light weight meals for backpacking trips (which by the way are packed with a ton of sodium and chemical crap), I would be able to make better, healthier, and CHEAPER dried meals myself.

Making meals and dehydrating them takes time, so it’s not really a great idea to start preparing these while you pack. Packing your gear and food is time consuming enough, so if you add the “make your own dried meals from scratch” aspect to the process, you will be a little sick of preparing for your trip and probably not want to go through the trouble of making your dried stuff own again. So yup (* note to self…), start early 🙂

If you ever embark on adventures like mine, perhaps these meals to follow will inspire you!

The following photos show a glimpse of the process for my meals coming together, with recipes posted at the bottom:

Jambalaya with Quinoa


jambalaya with quinoa

jambalaya with quinoa

jambalaya with quinoa

Spread on the dehydrator tray lined with parchment paper

dried bag of Jambalaya with Quinoa

Ta da! The result!

Nice, compact, light meals great for packing into your hiking or canoe pack. I tend to fill my (80 litre!) pack to the brim so the lighter, the better. Here is a visual of said pack. It sits taller than me.

hiking with pack on scenic trail

Greek Red Pepper Dip

food processor filled with dip ingredients

blended dip ingredients

dip spread on dehydrator tray

When this stuff is nice and dry, I put it in the blender to make it into powder so it can rehydrate properly.

I used this in a wrap, pictured below. I also re hydrated potatoes and peppers to add to the wrap. (The potatoes were sliced and cooked before dehydrating.)

wrap with greek red pepper dip and veggies

Similarly, I make sauces which are dried kind of like the hummus (greek red pepper dip above) and powdered in the blender for use at camp. My favorite is probably the Mac and Cheese sauce from a recipe I’ve posted on this blog before. My hubby and I both love this recipe and make it often – it makes a lot of sauce so we just throw the extra on the dehydrator. Awesome!

I came up with a great combo for camp, inspired by a recipe from a non vegan cook book for asian beef lettuce wraps. The peanut sauce is so tasty and I use it for a sauce for dried TVP (textured vegetable protein) which of course will get re hydrated at camp. I also rehydrate some peppers and onions, fry them, then combine with the TVP and sauce. I’m gourmet like that sometimes.

Peanut Sauce

preparing peanut sauce in blender

peanut sauce on liquid dehydrator tray

peanut sauce from asain lettuce wrap recipe (3)

The top, darker looking bag is the sauce before powdering. The other is the TVP, and the other dried veggies for this recipe are in the background.

Finally, don’t forget about good ‘ol dried fruit! I have another previous post on drying your own fruit. You can snack on it, add it hot or cold to breakfasts, etc.

Now for the recipes used:

Jambalaya with Quinoa – from Backpacker Recipes website

dehydration time: 8 to 10 hours
makes 6 to 8 servings
3 cups quinoa (rinsed and drained)
4 tablespoons olive oil
2 onion (minced)
2 bell pepper (minced)
20 fresh mushrooms (minced)
56 ounces canned crushed tomatoes
30 ounces canned white beans (drained)
2 teaspoon dried thyme
1 teaspoon salt
1/2 teaspoon cayenne pepper

  • Place the quinoa in a saucepan with 5 1/2 cups water, bring to a boil; then reduce heat and simmer for 20 minutes or until tender and translucent. Set this aside.
  • Heat a fry pan over medium-low heat, add the olive oil. When the oil is hot add the onions, bell peppers and mushrooms and stir for 10 minutes.
  • Stir in the tomatoes, beans, and herbs and bring to a boil, let in simmer for 5 minutes. At this point your kitchen should be filled with a heavenly smell.
  • Add the quinoa to the mixture and blend.
  • Spread this mixture out onto dehydrator trays and dehydrate. I did it overnight on the plastic trays that hold moisture, and I had to flip the food over in the morning to fully dry it all.
  • This then goes into ziplock bags. On the trail I simply put the Jambalaya into my cook pot, added water to cover the food and brought it to a boil and simmered a couple of minutes, and then let it sit several minutes to fully hydrate. The amount of water you add is something you need to experiment with, if you add too much you just end up with a bit of soup to finish off your meal with. I do stir the mix while heating to be sure that it doesn’t burn on the bottom.

Greek Red Pepper Dip – from Backpacker Recipes website

Dehydration Time: 5–7 hours
Makes 4–8 servings

2/3 cup roasted red peppers
2 19-ounce cans chickpeas, rinsed and drained
6 tablespoons lime juice
4 cloves garlic
4 tablespoons tahini
3 tablespoons capers
1/2 teaspoon dried oregano
Pinch of kosher salt

At Home

  • (I just used store bought) Roast the red peppers. Once they’ve cooled, peel them and chop them into 1/4-inch pieces.
  • Combine all the ingredients in a food processor or large bowl if using a hand blender. Process them until you have a thick paste.
  • Spread evenly on lined dehydrator trays, keeping the mixture about 1/4 inch thick. Dry for 5 to 7 hours or until the mixture crumbles and is thoroughly dry. Store in a medium ziplock freezer bag.

At Camp

  • Rehydrate the dip using a formula of 1 1/2 parts dried mix to 1 part water. Wait 5 to 10 minutes then add a little more water if it’s too dry. Serve as a dip with Greek pitas or your favorite crackers or use as a spread in a wrap.

Peanut sauce

1/4 cup light coconut milk
2 Tbsp natural peanut butter
4 tsp low sodium soy sauce or coconut aminos
4 tsp rice vinegar
2 tsp sesame oil
1 1/2 tsp minced garlic
1 tsp honey or agave
1 tsp sesame seeds
1 tsp minced fresh ginger
1/2 tsp hot Asian chilli sauce

Combine ingredients in blender, then dehytrate. At camp, re hydrate sauce by adding boiling water to consistency and let it sit; once sauce is ready add to re hydrated pan fried veggies and re hydrated TVP, simmer for 5 – 10 minutes until the mixture heats through and has had a chance to absorb the flavor.


Now go fire up your dehydrators!

Wild Rice Mushroom Soup

I love the flavor of this comforting soup. A great fall recipe full of mushroomy and creamy goodness! I adapted this recipe from a cookbook called The Vegetarian Collection.

The original recipe calls for two different types of mushrooms, dried and fresh. I think you can use whatever two types of mushrooms you like, use what you have on hand.


– makes 6 servings –

  • 3 Tbsp olive oil
  • 4-5 cups sliced or chopped mushrooms. Use two types of mushroom.
  • 3/4 tsp salt
  • 1/2 cup vegetable or mushroom broth
  • 2 cups diced onions
  • 2 cups diced celery
  • 2 cloves garlic, minced
  • 1  tsp dried thyme
  • 1/8 – 1/4 tsp ground black pepper
  • 2 cups vegetable or mushroom broth
  • 2 cups water
  • 1 1/2 cups cooked wild rice (follow package directions or this link)
  • 1/4 cup plain (unsweetened) almond milk


If you plan on using some dried mushrooms, make sure you pre-soak them.

In a large skillet, heat half of the olive oil over medium high heat. Sautee mushrooms and 1/4 tsp of the salt until golden, about 5 minutes.

Add broth, cook until most of the liquid is evaporated, about 1 minute.

mushrooms in broth


In a large saucepan heat remaining oil over medium heat and fry onions, celery, garlic, thyme, pepper and remaining salt, stirring often until very soft, about 10 minutes.

Add broth and 2 cups water, bring to a boil. Reduce heat and simmer, stirring occasionally, for 20 minutes. Stir in mushrooms, wild rice and almond milk. Bring to a simmer over medium heat, stirring often. Remove from heat, enjoy!

mushroom soup with broth added

wild mushroom soup

Pure delish!! Definitely a new favorite. Serve it with a salad and you’ve got a great, healthy meal.

Creamy Rice Bowl – A New Favourite Recipe

This recipe involves making a spice blend, a sauce, and the recipe. But a little work is SO worth it, you won’t be disappointed! I love the flavor of this recipe so much that I could probably eat it every day. The great thing is this recipe also freezes very well, so you can double the batch and freeze some (if you don’t eat it all) for future meals. So at least this way you save on time the next time you want to eat it – which, if you’re like me, you will crave it regularly. I’m drooling a little while posting this one.

This recipe comes from Thrive Foods, another great Brendan Brazier book.

Shanghai Rice Bowl

(recipe claims to serve two but I think it makes more – depends on how big of an eater you are I guess)

  • 1/3 cup water
  • 4 baby bok choy, cut in half lengthwise (or chopped smaller if you like)
  • 6 Tbsp olive oil
  • 6 tbsp tamari (or could be replaced with soy sauce, etc)
  • 3 cups shiitake mushrooms, stems removed and halved if large (I just used reg. sliced mushrooms)
  • 4 cups cooked brown basmati rice
  • 1/2 cup tahini sauce (recipe below)
  • 2 tsp mixed herbs (recipe below)
  • 2 cups sunflower sprouts (I used an alfalfa sprout mixture)
  • 2 Tbsp hulled hemp seeds (Hemp Hearts)
  • 1 cup cooked or canned chickpeas (I just tossed in the entire can)

Tahini Sauce (makes more than you need for single recipe)

  • 2 cloves garlic, minced
  • 1/2 cup chopped fresh parsley (I’m not a huge parsley fan, so I halve that amount)
  • 1/2 tsp sea salt
  • 2 Tbsp lemon juice
  • 2/3 cup filtered water
  • 1/2 cup tahini (sesame seed paste)

In a blender, process garlic, parsley, salt & lemon juice until smooth. Add water & tahini, process until smooth. Add a bit of water if too thick. Can be stored in a container in the fridge for 4 days. (You only need 1/2 cup of this sauce for the single recipe above).

Mixed Herbs (makes more than you need for single recipe)

  • 1 Tbsp dried oregano
  • 1 Tbsp dried basil
  • 1 Tbsp dried marjoram
  • 1 Tbsp dried dill
  • 1 Tbsp dried thyme
  • 1 1/2 tsp dried rosemary
  • 1 1/2 tsp dried sage

Combine all ingredients and mix well. Store in an airtight container – it will last forever. Just rub it between your fingers before using to release the flavors. Use on pastas, salads, rice bowls, etc. Or save it for every time you make this recipe!

OKAY DON’T GET INTIMIDATED AT THIS POINT. I realize it looks like a lot, but it’s really not! Here comes the easy part:

  • Make sure you’ve cooked your rice if you haven’t already. Let it cook while you get the rest of the recipe together and set aside until you need it.
  • Put the water in a wok or skillet over high heat. Add the bok choy and cover. Steam until the bok choy is almost tender (5 minutes). When the water evaporates, add 2 Tbsp of the olive oil, 2 Tbsp of the tamari, and the mushrooms. Saute 5 minutes until bok choy and mushrooms aare tender. Set aside.
    bok choy and sprouts

    Some prepped bok choy, with the sprouts ready for later.

    Sauteeing mushrooms and bok choy

    Oooh, steamy!!

  • Get a large pot, or you could possibly use the pot you cooked the rice in if it’s large enough. Combine the 4 cups of cooked rice with the 1/2 cup tahini sauce, 4 Tbsp olive oil, and 4 Tbsp tamari. Sprinkle with 2 tsp mixed herbs and add in the sauteed bok choy/mushroom mixture. Give this all a good stir.blender with tahini saucemixed herbs
  • Then stir in the sprouts, hemp seeds and chickpeas.

    Finished creamy rice bowl

    Not the best final shot. I was distracted by the deliciousness so I forgot about proper photography!

  • ENJOY!!