Growing Your Own Produce – Square Foot Gardening

Anybody else reading this blog live in Canada? Are you reading this during Winter 2013-14? Then enough said. I’m sure you’re going as crazy as I am. This winter has been the absolute worst. Non stop freezing temperatures. More snow than we know what to do with. Give us a break and bring an early Spring, mmmkay Mother Nature!?

In order to mentally escape from this winter’s reign of terror, I’ve been thinking a lot lately about gardening. Last summer was the first opportunity I had to finally start a garden of my very own. We finally had a house and a yard of our own, and I wasn’t about to wait another year (after MANY years of apartment living) to get going, even though we had been in the house under 6 months and were mid-bathroom renovation. So my husband and I researched, planned and executed our garden. We were so happy with the result, I wanted to share the experience with you all! I hope it inspires you to grow something, no matter if it’s on a large or small scale.

We started our gardening research with a book called All New Square Foot Gardening, by Mel Bartholomew. If you are considering growing anything, whether you have a tiny amount of space, or have a huge yard, get your hands on this book! I think it is the best resource you can use. If you follow the method in this book, I can pretty much guarantee you will actually enjoy gardening. All it really takes is a proper set up, and most of the rest of the time is spent enjoying it. It is not only efficient, but you do not have to worry about learning how to improve whatever existing soil you might have. You don’t need to own a bunch of gardening equipment (who wants to go out and buy a rototiller!?), fertilize, spend hours bent over weeding, and you can scatter your garden around as you wish instead of having one big boring row garden at the back of your yard!

So once we decided we were going to create a square foot garden, we needed to plan how much we wanted to grow and where we could grow it in our yard. After some Google searches on garden planning tools, I came across an online garden planner software. The one I used is GrowVeg.com (I have no affiliation to this company – I am sure there are other planners out there, this is just the one I use). Although a tool like this is not necessary, I found it to be really helpful, especially as a gardening newbie! We decided that we would need a total of five boxes of varying sizes. Two of them would have trellis for anything we needed to grow vertically.

We also decided to grow a big variety and to start everything from seed ourselves. I realize this may have been quite ambitious for our first time at all of this, which the book even warns against – and it might be for some, but my husband and I are the “go big or go home” type people. We wanted to just go for it. After all, we had been waiting for this opportunity for many years. If you are overwhelmed by going big or a lot of work the first time, then start small. You can always build up your garden and your knowledge over time. Do what works for you!

tomato, leek and onion seedlings

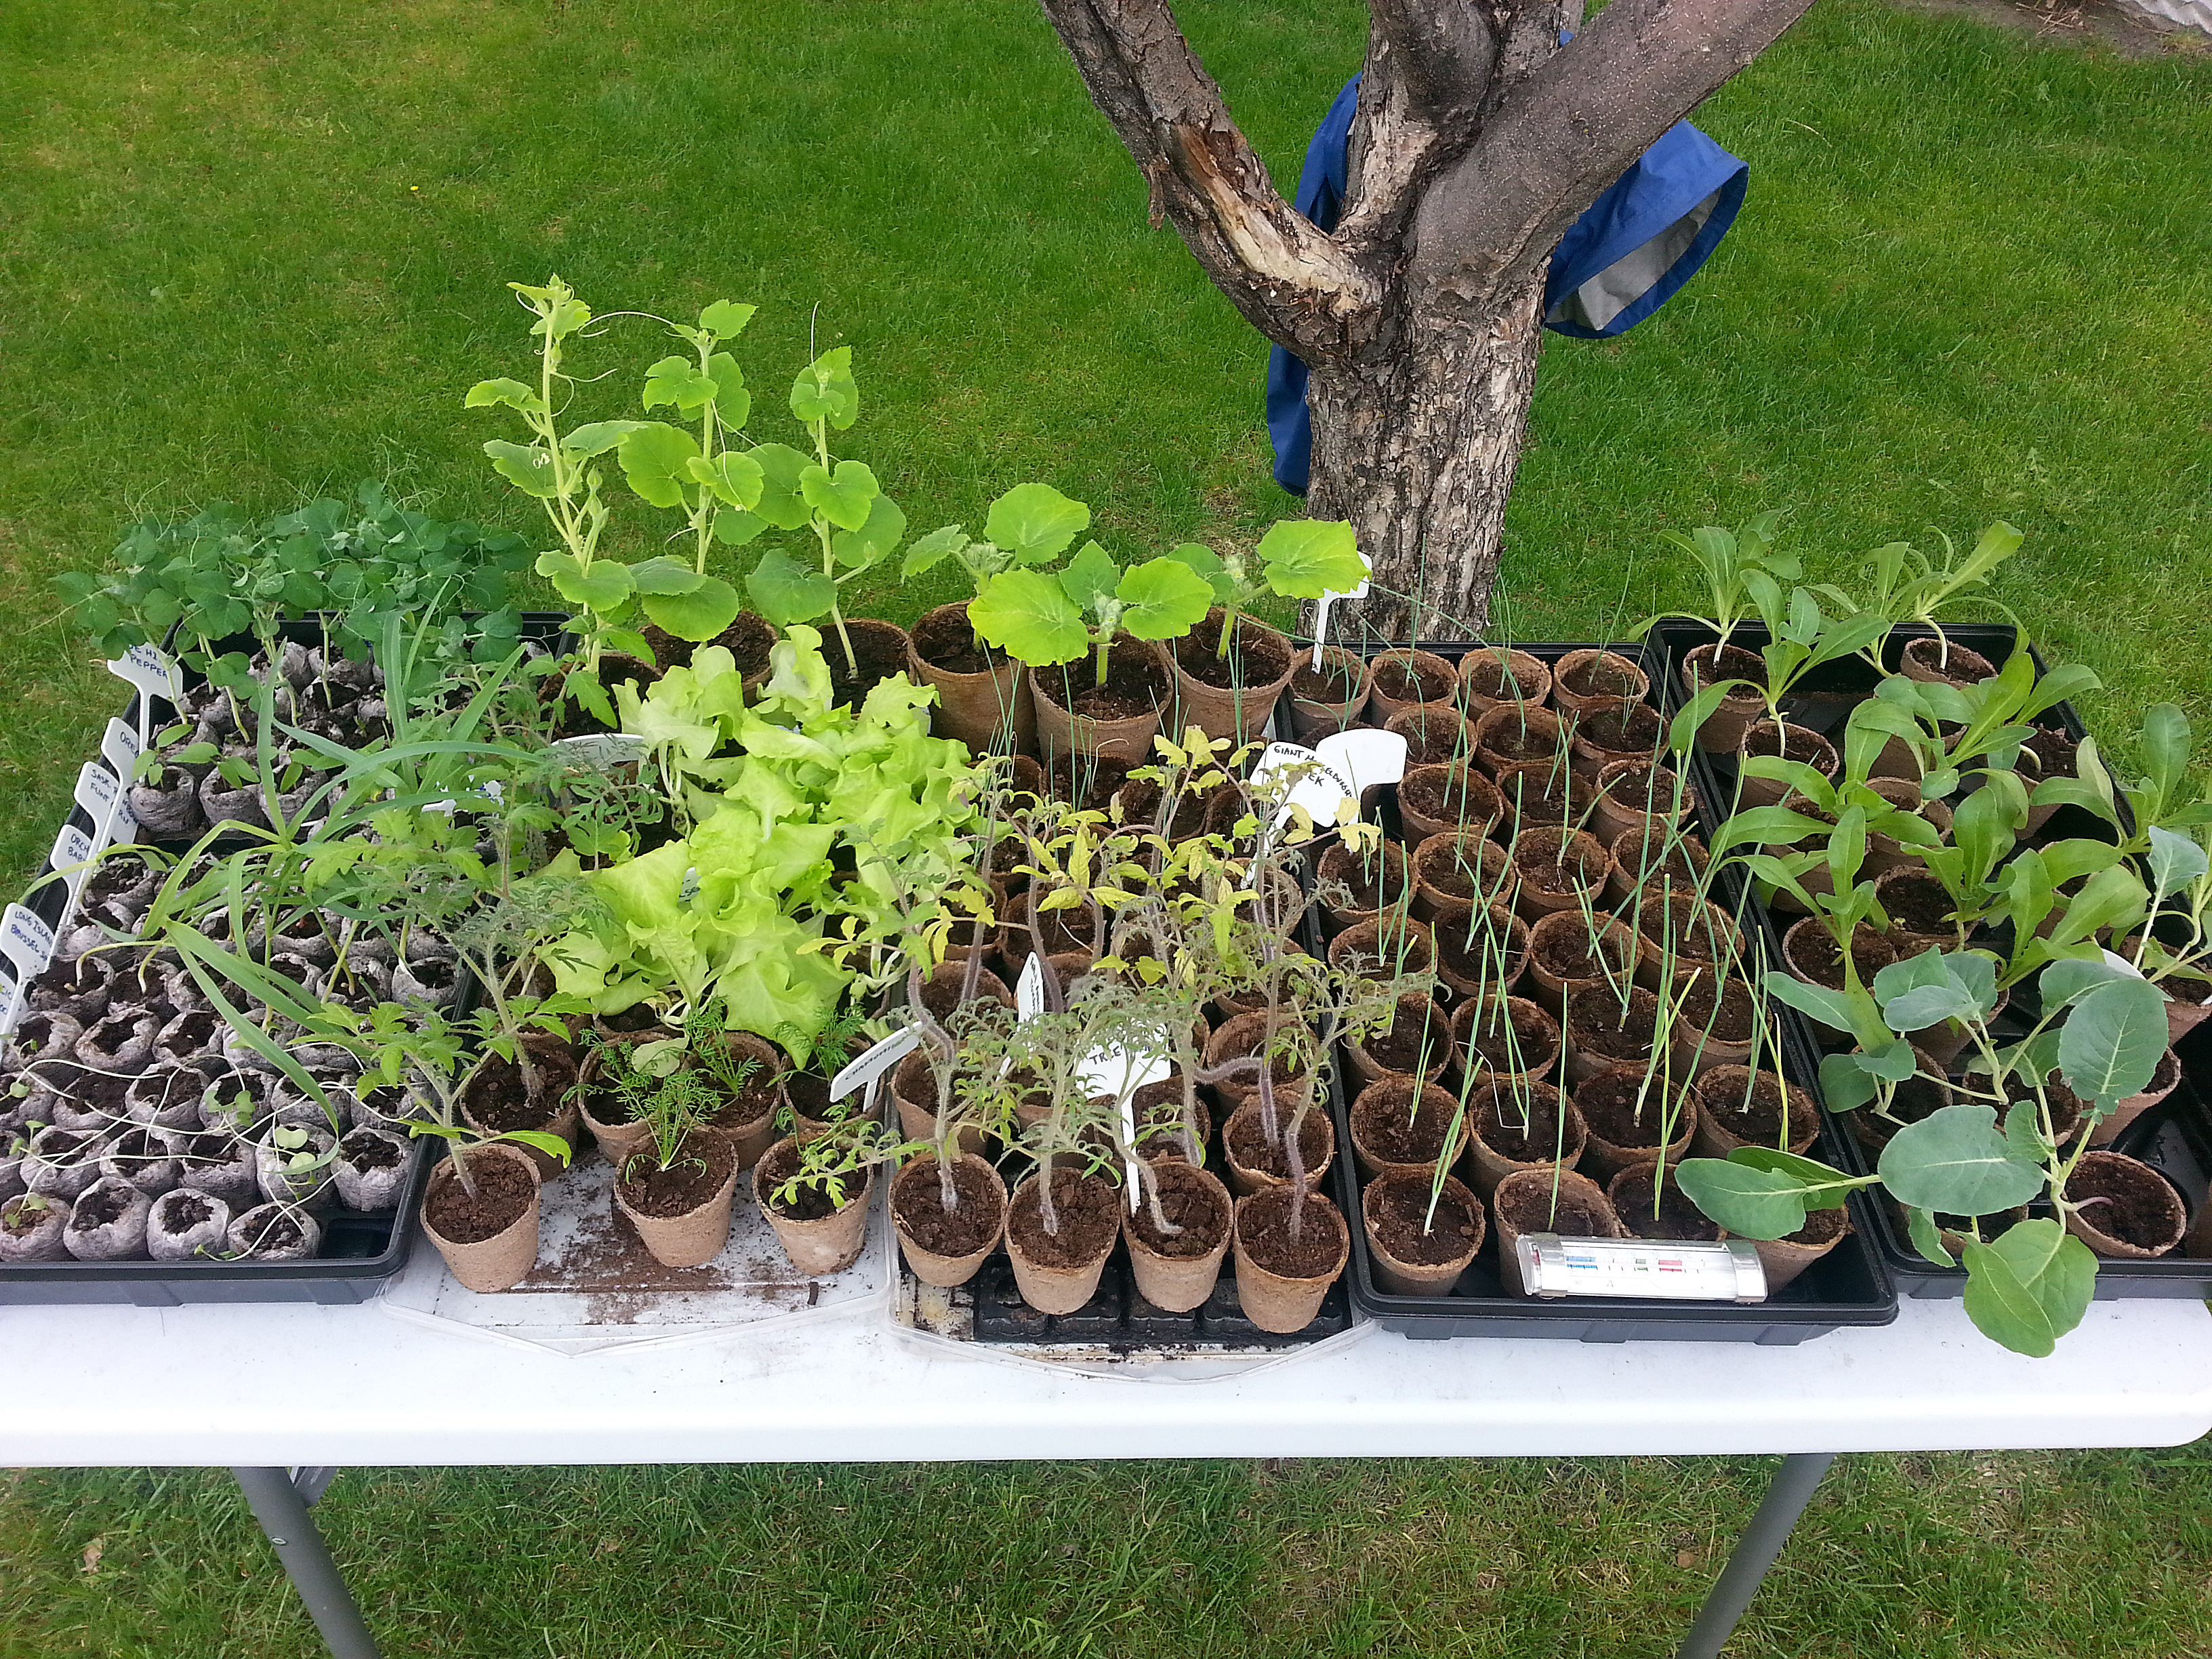
Tomatoes, Leeks and Onions

Once deciding on what we wanted to grow with the help of our garden planner, next we searched for a source for seeds. We found a local heirloom seed company offering organic, untreated, non-GMO , open pollinated seed. Wonderful! And since we used the GrowVeg garden planner, we began receiving emails to let us know what seeds to start indoors, and when! How awesome is that? It definitely made our ambitious plans go smoothly. We made a set up in our basement with fluorescent lights, small heater, fan and a table and got our seeds going in the necessary phases. Everything we started from seed worked! It was a great feeling of success.

plants started from seed in the basement

The most important component of getting our garden going properly with the square foot gardening method was the soil blend made of 3 components, called “Mel’s Mix” by the square foot gardening book. If you don’t do this right, you are not as likely to get the kind of success you should with square foot gardening. So we sourced our soil ingredients from a garden center and a local company providing high quality compost, and figured out the quantities needed in preparation for building and planting the garden. Those little plants growing in our basement soon needed a home! Next came gathering the building materials (the square foot gardening book has lots of information on construction). We chose untreated cedar so the boxes will be around for years to come. Cedar also smells amazing… We built the boxes according to the plans we made, put the weed cloth on the bottoms with a staple gun, and moved them around the yard into position.

components of soil mix for square foot garden

building garden boxes for square foot garden

arranging square foot garden boxes

Once the boxes were ready, we blended our soil mixture on a large tarp so we could get ready to fill our garden boxes. After double checking everything was exactly where we wanted it, we filled the boxes. What a feeling of accomplishment! The hardest part was over.

blending mel's mix soil mixture on a tarp

square foot gardening boxes filled with soil

Before planting, the last step was creating “the grid”. Also very important to square foot gardening. You need to see where each square foot is in your boxes. It made planting seeds and transplanting with the proper spacing a breeze (and can I even say…fun?). We used sturdy, small strips of wood to create our grids for the boxes.

square foot gardening grid with holes poked in the soil to show plant spacing

a table of transplants ready to go in the garden boxes

Now our plants could settle in their homes. And boy, did they grow.

planted square foot garden with trellis

We put up trellis to support any crops that can grow vertically. We also enclosed each box with chicken wire to keep the rabbits out.

Finished square foot garden yard with mulch between garden boxes

Finishing touches were added to our yard. It really brought the whole thing together.

The plants were happy in their little garden boxes…

6 by 3 square foot garden box with chamomile, green onion, onion, oregano, broccoli, cabbage, corn

From top: chamomile, green onion, onion, oregano, broccoli, basil, cabbage, corn.

8 by 2 square foot garden box with trellis and tomato, pepper, cucumber, tomato, parsley, peas, calendula, tomato, basil, cucumber, bush wax beans, more tomato and cucumber, zucchinis

From top: tomato, pepper, cucumber, tomato, parsley, peas, calendula, tomato, basil, cucumber, bush wax beans, more tomato and cucumber, zucchinis.

2 by 3 Square foot garden box with Kale, lettuce, spinach, beets

Kale, lettuce, spinach, beets.

Square foot gardening in pots. Dill, pepper, calendula, pumpkin, chives.

Square foot gardening in pots. Dill, pepper, calendula, pumpkin, chives. The pepper loved growing in a pot, while the pumpkin wasn’t happy and died.

Square foot gardening with root crops such as carrots, parsnips and leeks required a deeper box to grow

The root crops such as carrots, parsnips and leeks required a deeper box to grow.

pumpkin and squash in a square foot garden

Pumpkin and spaghetti squash. These required 2×2 squares for each.

growing square foot garden

Beginning of July

square foot garden growth, end of July

End of July. What a difference 1 month makes!

Mid-to-later August growth.

Mid-to-later August.

square foot garden growing pumpkin and squash vertically

Ever see pumpkin and squash grow vertically? I was pretty proud of these beasts.

Here are some shots of goodies we had throughout the summer…

white blooms on apple tree

Did I mention our house has apple trees!? How perfect for us. These were the blooms we saw while we first planted our garden back in May.

gala apples

Gala apples. The other tree is Golden Delicious!

pea pods

Pea pods starting to grow

having coffee and harvesting herbal flowers in a square foot garden

One of my favorite things was coming out to the garden in the morning with my coffee and caring for the garden, harvesting, etc. A great way to start the day.

Harvest of lettuce, spinach, beet greens, chamomile and calendula.

Harvest of lettuce, spinach, beet greens, chamomile and calendula.

ripe raspberry on a rasperry bush

Our home also came with raspberry bushes!

small corn cobs

The corn cobs didn’t grow very big. I’m not sure if they were worth the space. However, non-GMO corn is difficult to find, so growing my own might be the best option.

harvested yellow wax beans

Yellow wax beans. Our one square foot of beans produced a lot and I will grow an additional square next time.

20130728_110721

large pumpkin (34 pounds) grown in square foot garden

We got one GIANT (34 pound!) pumpkin from our plant. Next time I plan on growing small sugar pumpkins, but how impressive is this!?

broccoli head

We grew several broccoli, cauliflower, and brussel sprout plants. The plants got enormous and we only had one plant produce a head. Sad face. Next time I won’t grow these. They would probably be better off grown in the front yard; not crammed into one square foot of the garden where they shade out other plants.

harvested heirloom zucchini

I loved the look of these zucchinis. Heirloom vegetables are the best! We got tons of them from our two giant plants.

spaghetti squash

We got about 5 spaghetti squash from one plant and they were amazing.

dinosaur kale

We had a ton of dinosaur kale.

table full of ripe tomatoes

The tomatoes were destined for salsa and sauces.

A tiny carrot with small sweet peppers in the background.

A tiny carrot with small sweet peppers in the background.

Harvest of cucumbers, tomatoes, beans, apples, onions, beets, and squash.

Harvest of cucumbers, tomatoes, beans, apples, onions, beets, and squash.

Pumpkin, carrots, peppers, beans, herbs, leeks, squash, parsnips.

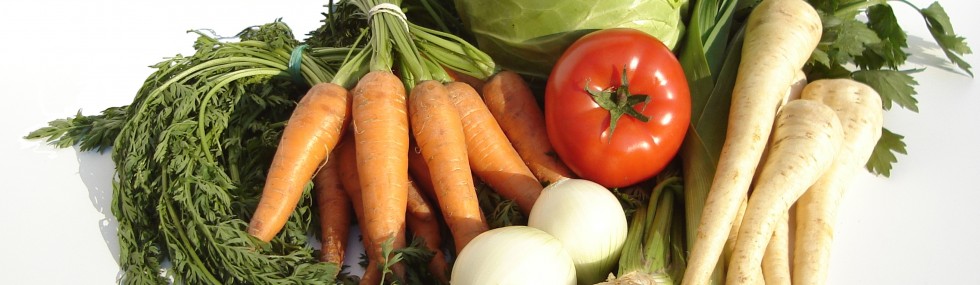
Last harvest of the season as the frost was on its way. Pumpkin, carrots, peppers, beans, herbs, leeks, squash, parsnips.

Are you going to try a square foot garden this summer?

Nothing But Good Stuff Protein Trail Mix Cookies

I think I will only make this cookie or versions of this cookie from now on. These not only taste amazing but they are full of purely good stuff. They don’t contain flour of any kind (gluten free!), no oil, and low amounts of natural sugar, plus they are packed with protein and other healthy nutrients! I would call this a Supercookie!!

Thanks Peas and Thank You for another great recipe!

Ingredients (12 cookies)

  • 3 T. flax seeds (ground into meal) or buy pre-ground flax seeds
  • 3/4 c. non-dairy milk (I used unsweetened plain Almond milk)
  • 2 c. old fashioned oats
  • 1/4 c. sunflower seeds
  • 1/4 c. pepitas – chopped if desired (these are the inner part of a pumpkin seed)
  • 1/4 c. chopped almonds (I pulsed whole almonds in my mini blender)
  • 1/4 c. raisins
  • 1/4 c. dark chocolate chips
  • 1/2 c. vanilla protein powder (I used Vega One All In One Nutritional Shake powder, Vanilla Chai flavor – has no added sugar and amazing flavor!)
  • 3 T. honey (I used about 4 Tbsp agave)
  • 3/4 t. salt
  • 1/4 t. vanilla
  • stevia to taste (I used 2 packets I believe which is 4 tsp – but add a bit, mix, taste, and see how you like the flavor. Adjust sweetness if necessary)

Instructions

  • Preheat oven to 350 degrees.
  • In a small bowl, combine ground flax with milk and set aside.
  • In a large bowl, combine remaining ingredients.

cookie mixture

  • Add flax mixture to dry ingredients and stir until combined.
cookie mixture before forming into cookies

Look at all that whole food goodness!

  • The mixture will seem a bit dry, but will hold together when forming the cookies.
sticky cookie hands

The mixture likes to make your hands pretty sticky. Be patient when forming the cookies, it's worth it 🙂

  • To make cookies, spoon dough into your hands and pack cookies. Ration the dough so you can make 12 cookies. Place the cookies on a cookie sheet that has been sprayed with cooking spray or lightly greased.

mixture formed into vegan cookie
cookies on cookie sheet

  • Bake for 6-8 minutes, until cookies are slightly browned. Let them cool completely on the pan before transferring to an airtight container.
finished vegan protein trail mix cookies

They don't look much different when baked, and are super chewy and soft

I hope you enjoy these healthy treats as much as we do!

Ceviche – Raw salad cooked by citris juice

I had no idea what Ceviche was, I  just knew when I read the ingredients on the recipe it looked good! I came across it in my Vegetarian Collection cookbook. The cookbook says it is commonly served throughout Central and South America, but is usually made with seafood in it. You could eat this like a salad or heap it on top of crispy whole wheat pita bread like we did! The ceviche is “zingy” and flavorful. It also has ingredients I normally don’t like raw if at all, like olives and tomatoes, but I gobbled this up! The fat fills you up, and not in the gross “I need to unbutton my pants and let my gut fly” kind of way, so you could have it as a light supper, snack, or appetizer.

Vegetarian Ceviche

  • 2 Tbsp lime juice
  • 1/4 tsp each salt and pepper
  • 1/3 cup olive oil
  • 3 Tbsp chopped fresh parsley
  • half jalapeno pepper, seeded and minced
  • 1 can hearts of palm, drained and rinsed (check the Indian isle of your grocery store)
  • 2 avocados, peeled and pitted
  • 2 cups grape or cherry tomatoes, quartered
  • 1/2 cup finely diced red onion
  • 1/2 cup chopped green olives (optional)

In a large bowl, whisk together lime juice, salt and pepper. Whisk in oil until thickened. Stir in parsley and jalapeno.

ceviche preparation

Real men eat plants and know how to make delicious food 🙂

Cut hearts of palm into thin rings and avocado into 1/2 inch pieces; add to bowl along with tomatoes, onion and olives. Toss to coat. Let stand for 10 minutes, or refrigerated, up to 6 hours (I’m not sure when happens after the 6 hours…this is just what the recipe states).

hearts of palm getting mixed into lime juice olive oil mixture

finished ceviche
While the flavors mingled together, we split whole wheat pitas, brushed them with a little olive oil and a sprinkle of garlic powder, baked them on an oven sheet at 375 for about 5 minutes (this is just a guess – just watch them. They should get brown and crispy but they burn easily, so keep those peepers peeled!)

Nom nom nom…

ceviche on top of baked pita crips

Mexican Quinoa Bake

This dish is easy, low in calories, and packed with nutrition. It’s also tasty and versatile – just add whatever other Mexican flavors you like to it! I had leftover green onion and jalapeno to use up that was already chopped up from other recipes, so I added this to the recipe as well.

I got this recipe off the Daiya website.


Servings: 6
Preparation Time: 40 minutes
Ingredients:
2 1/2 cups cooked quinoa (I cooked the quinoa in veggie broth I needed to use up)
1 cup fire roasted diced tomatoes with green chiles OR salsa (I used fresh tomatoes and mixed with some salsa)
1 Tbsp cumin
15 oz can of black beans (drained and rinsed)
10 oz frozen corn kernels
4 oz can mild green chili peppers, chopped (if you use salsa and not diced tomatoes with chiles)
2 Tbsp chili powder
10 oz frozen chopped spinach, thawed & drained
1 cup Daiya Cheddar Style Shreds (I used about 1/2 a cup – Daiya is strong sometimes and didn’t want it to overpower the dish)
Instructions:

Pre-heat oven to 350 degrees.

Coat your favorite casserole dish with olive oil or non-stick spray. In a mixing bowl, combine cooked quinoa and tomatoes, set aside.

In a separate bowl mash the black beans with a fork. Combine beans, corn, chili powder & cumin in the same bowl and set aside.

mashing black beans

combining veggies and spices

Spoon 1 cup of the quinoa mixture on the bottom of the baking pan. Layer spinach on top of the quinoa. Scoop bean mixture on top. Sprinkle with 1/2 cup of Daiya cheddar shreds. Add the remaining quinoa and top with the remaining cheese.

layer of quinoa, tomatoes and spinach

layer of bean mixture added and Daiya

Bake for about 30 minutes until the Daiya has melted. Serve and enjoy!

finished Mexican quinoa bake

Getting All Your Vitamins

*Disclaimer – I am not a medical professional and this should not be taken as medical advice. Always consult with your trusted health care professional and do your own research!*

Although there are fortified foods available for vegans, from what I have researched it is good to take a vitamin to supplement certain nutrients that are probably lacking in most vegan diets. (Vitimin B12 is probably the most common, as it is mostly found in animal products). I recently ordered a vitamin specifically for vegans, and it was quite cheap! It is called Veg 1, formulated by the Vegan Society in conjunction with HealthPlus.

Vegan vitamin

For a 90 day supply, after shipping from the UK (far from me!) it worked out to be around $14 I think. I ordered two, and I like the orange flavor the best. Do you take any supplements on a vegan diet?